Tuesday 30 April 2013

Mother's Day

It is Mother's Day here in Australia on May the 12th so we have been enjoying talking about just how wonderful our Mums are. I find, when asking three year olds about their Mothers I get soo many beautiful, funny and interesting comments - and I love writing them on their paintings for the Mums to read.
We have made some gorgeous bags for our Mums, beautiful wrapping paper, cards, paintings of our Mums and hearts.

Today I thought I would feature our painted hearts and our beautiful wrapping paper.

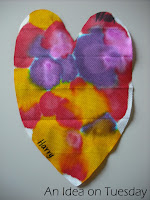
I took some paper towels and cut them into heart shapes. The children then used eye-droppers to drop ink all over the heart. This took them a little while to grasp the concept of the eye-dropper but  it was a great fine motor activity and wonderful for discovering colour mixing.


When dry I pegged them to our classroom tree to be admired from inside and out!


Mothers Day wrapping paper:


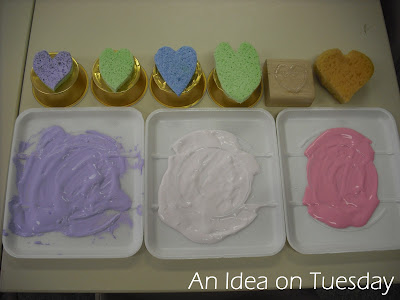
I love brown paper, so I use it whenever I can. With the pastel colours I mixed up I thought it looked just delightful.
I made the printing stamps by cutting out hearts of kitchen sponges and glued them onto recycled containers.
I also used my hot-glue gun to make some hearts on wooden blocks. 


I think the result is lovely!


Some of the paintings of our Mums. Don't you just love them!


Tuesday 23 April 2013

Funky Frames

FRAMES AT HOME:
Making funky frames at home.


Today we scrounged around the house to find some wooden frames that we could paint and display some of our artwork and photos.


These are two of the frames that were in desperate need of some creative intervention.


We started by painting the frames black.


This was a mini canvas that was needing to be painted over. I found a great drawing that my son had done of a pirate ship. I first painted a rough black boarder and let it dry. I traced the picture using carbon paper.


And voila!


I love using just black and white because it is soo striking and together the frames have a bold presence. 


I love the result and only for a few hours work!


FRAMES AT SCHOOL:
Making funky frames at school.


I filled old sauce bottle with equal amounts of paint and PVA glue.


Mix them up thoroughly.


And squeeze...


And squeeze...


And squeeze...


When these are dry they have a fabulous shiny finish. I took photos of all the children in my class and displayed on a wall which attracts a lot of attention and stimulates plenty of conversation.

Drag out some old photo frames or make some out of cardboard and enjoy displaying your children's photos and artwork.

Tuesday 16 April 2013

Fabric Farm


We have been busy making a large scarecrow for our new outdoor play area and he is finally finished and on display at the local garden show. Meanwhile back in the classroom we have been singing songs about scarecrows, reading stories and drawing pictures of different scarecrows.

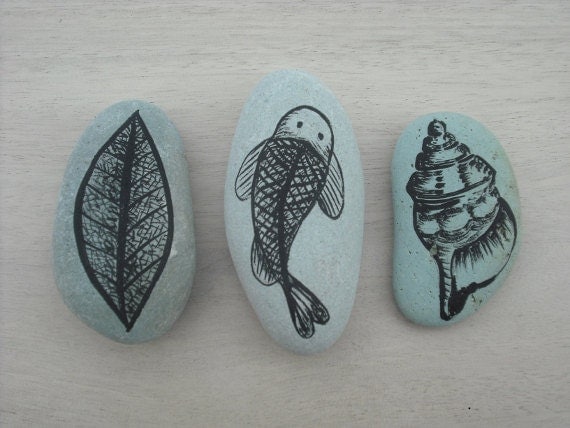
On the wonder table I set up an abstract farm setting with the paddocks being different square patches of printed fabric. Like an aerial photo of different crops. I cut olive branches (that we pruned on the weekend at home) into lengths that could be used as fences. I added some animals, some of my hand painted pebbles and of course a scarecrow made from recycled paper. 

I sell a variety of hand painted pebbles on Etsy

Painted Pebbles (Set No. 1) 

The pebbles can be used as a display on their own or for the children to hold and discuss. They can be used to prompt story telling or to compliment a play scene like I have done with our farm. They can be used anywhere but I have put them in the water trolley and block area. They allow the children to use their imagination as they do not have a specific function or purpose. They are an open ended resource.

We are all trying to use natural resources to teach our children to respect and appreciate the world around us and enjoy the beauty in nature.

Tuesday 9 April 2013

Alphabet Sorting


At the light table this week I drew up a grid on a piece of calico and wrote the the letters of the alphabet in every square (you could use paper, card or any material). I then used anything from nature that I could write the alphabet on. Once you start looking your realise that there are loads of resources right at your fingertips. All of these nuts and leaves were found on the ground at the park across the road from my house. Don't you just love a resource that costs nothing! The gum nuts have been used before on the blog "Bringing Nature Inside".


Washing Fun!


The washing line is one of our favourite things to play with at outside time. Today I put out the usual pieces of material but added thin strips of stretchy fabric. They loved washing the thin strips -  it was a much more interesting sensory experience and was a fabulous fine motor activity as it was about the same width as the peg.


Have a go at making your own nature inspired alphabet activity!


This post was featured on:
Growing a Jeweled Rose


Featured at TGIF Linky Party hosted by 123Homeschool4Me


Sunday Showcase feature4

Tuesday 2 April 2013

Recycled Flowers

Our class is in the process of making a scarecrow for our new playground and I was experimenting with some recycled materials that we could use to decorate his clothing with. I think that they are all funky flowers in their own way.


Making Flowers from recycled materials.


Cut the bottom off a plastic bottle and cut out petal shapes as above.


Using white glue, stick material or tissue paper to the backs of the petals. For this flower I used two bottles to create more petals.


Everyone has old plastic files lying around and this is a very quick way to make a flower that can withstand the rain.

I cut the cover of the file into strips, folded them in half and punched a hole through the end. I then tied them together with some string and finished it of with a bottle top in the centre.


As I was trying to come up with ideas that could be used outside, I thought that I would laminate some material to see how it would turn out.


Cut out two rough squares of material. Fold and cut as below to make flower shapes (this was the best thing I ever learnt!) Prior to this I was trying to cut petals evenly.


Feed the flower shapes through the laminating machine and cut out. I used a doily and a bottle top secured with some string to finish it off.


Pretty, don't you think?


This post was featured on: